Turn on Secure Boot and TPM
Rust is rolling out a requirement for TPM and Secure Boot with Easy Anti-Cheat, and our servers have it enabled now. Servers that require it show a "secure" tag in the server browser. If your PC was built in the last few years it almost certainly supports both, and they usually just need switching on. This page walks through checking and enabling them.
The steps below follow Facepunch's official guide, which is the authoritative version and the place to check if anything here disagrees with it.
1. Check whether it is already on
Check before touching the BIOS. Both features may already be enabled, and you can confirm it in under a minute.
Press Win + R together, type msinfo32 into the box that appears, and press Enter. In the list that opens, find Secure Boot State:
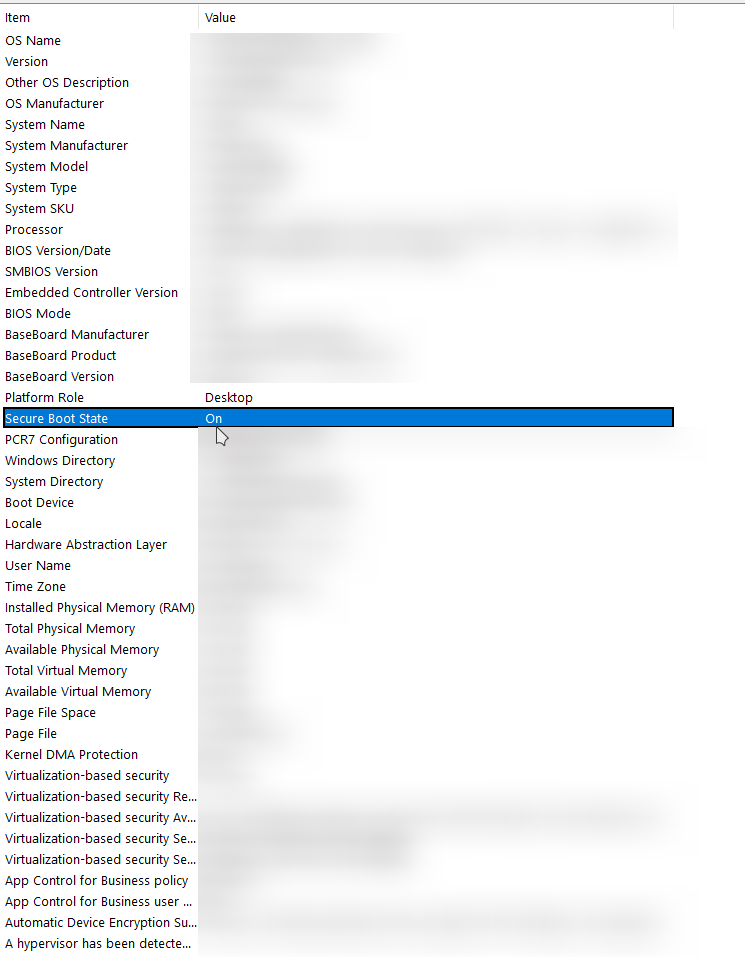
On means Secure Boot is already enabled and there is nothing to do for it. Off means it is supported but switched off, so follow the steps below. Unsupported means the firmware is not in the mode Secure Boot needs, covered further down.
Then check TPM the same way: Win + R, type tpm.msc, and press Enter. "The TPM is ready for use" means it is on. A message saying no TPM could be found means it needs enabling in the BIOS.
2. Get into the BIOS
TPM and Secure Boot are switched on in the BIOS (called UEFI on newer PCs), which loads before Windows. Restart the PC and tap the key for your brand repeatedly, starting the moment you press the power button, until the BIOS screen appears. If Windows starts loading you missed the window, so restart and try again.
| PC or motherboard | Key |
|---|---|
| ASUS | DEL or F2 |
| MSI | DEL |
| Gigabyte | DEL or F2 |
| ASRock | F2 or DEL |
| Intel NUC | F2 |
| HP | F10 or ESC |
| Dell | F2 or F12 |
| Lenovo | F1, F2, or DEL |
| Acer | F2 or DEL |
msinfo32 window, on the BaseBoard Product line.3. Turn on TPM
Which setting you need depends on your processor. The Processor line in the msinfo32 window says whether it is Intel or AMD.
- AMD (Ryzen): open the menu named Advanced, AMD CBS, or AMD fTPM Configuration. Find AMD fTPM switch or TPM Device Selection and set it to Firmware TPM or AMD CPU fTPM.
- Intel (Core i3, i5, i7, i9): open Advanced, PCH-FW Configuration, or Security. Find Intel PTT or TPM Device and set it to Enabled.
Save and exit, which is usually F10, then confirm.
4. Turn on Secure Boot
Still in the BIOS, open the menu named Boot, Security, or Authentication, find Secure Boot, and set it to Enabled. If it asks for a Secure Boot Mode, choose Standard. Save and exit with F10 and confirm.
5. Check it took
After Windows loads, run both checks again. tpm.msc should say the TPM is ready for use, and msinfo32 should show Secure Boot State as On. With both of those, you can join the secure servers.
If you would rather watch it done, this video covers enabling Secure Boot on an MSI board, and the idea is the same on the others:
If it goes wrong
- The PC will not boot after a change. Go back into the BIOS the same way and choose Restore Defaults, Load Optimised Defaults, or Reset to Default. That undoes everything. If you cannot get into the BIOS at all, the motherboard has a CMOS reset button or jumper, described in its manual.
- The options are not there. Search for your exact motherboard model plus "TPM enable" or "Secure Boot enable". The manufacturer's site has a free manual.
- The PC is too old. Machines from before about 2016 often have no TPM 2.0 or Secure Boot at all. If the BIOS is plain text with no mouse, and there is no mention of TPM, fTPM, PTT or Secure Boot anywhere, the hardware does not support it and only a newer motherboard and processor will.
Enabling these on a modern PC with a normal Windows installation does not break anything. It is a routine change.